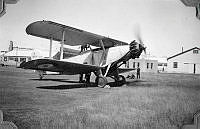
• 1985-215.9e
    Air Force Museum of New Zealand
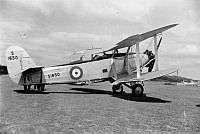
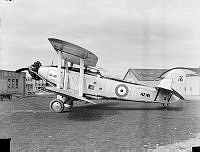
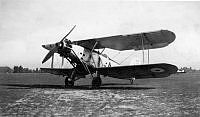
    Image from the L Crowe personal collection. Side view of Baffin S1650 (later NZ173) at RNZAF Station Hobsonville.
    RNZAF
    World War Two
    WW2
    Baffin
    NZ173
    S1650
    Hobsonville
  • MUS0308911
    Air Force Museum of New Zealand
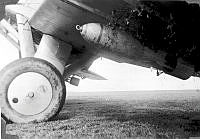
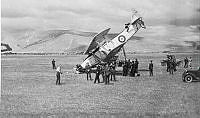
    Image from the John Reginald Burke personal collection. 250 pound bombs fitted to the wing of a Baffin. RNZAF Station Hobsonville.
    RNZAF
    Air Force Museum of New Zealand
    Burke
    World War Two
    WW2
    Hobsonville
    weapons
    Baffin
  • MUS030893
    Air Force Museum of New Zealand
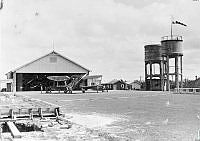
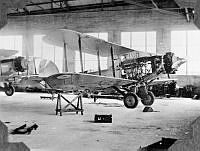
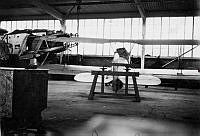
    Image from the John Reginald Burke personal collection. Engine Repair Section hangar at RNZAF Station Hobsonville with a Baffin, with one wing folded, in front.
    Burke
    Air Force Museum of New Zealand
    RNZAF
    Hobsonville
    Baffin
    Engine Repair Section
    ERS
  • MUS030897
    Air Force Museum of New Zealand
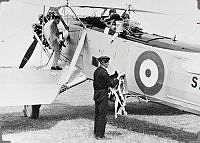
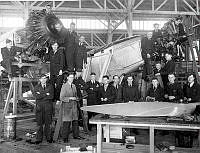
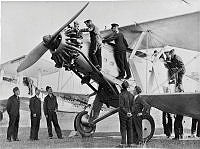
    Image from the John Reginald Burke personal collection. Fitters and riggers preparing a Baffin for flight. One on the ground passing a parachute to another in the rear cockpit. RNZAF Station Hobsonville.
    Burke
    Air Force Museum of New Zealand
    RNZAF
    World War Two
    WW2
    Baffin
    parachute
    Hobsonville
  • MUS030903
    Air Force Museum of New Zealand
    Image from the John Reginald Burke personal collection. View inside No. 2 hangar, showing Baffin K4001 undergoing repairs. RNZAF Station Hobsonville.
    Burke
    Air Force Museum of New Zealand
    RNZAF
    World War Two
    WW2
    Baffin
    K4001
    hangar
    Hobsonville
  • ALB845871b071
    Air Force Museum of New Zealand
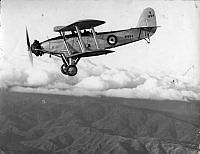
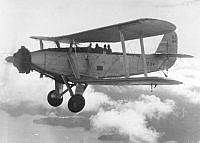
    Image from the Desmond Lloyd Percy Tugby personal album collection. Air to air view of Baffin S1654 (later NZ156) in flight over mountains. Unknown location in New Zealand.
    RNZAF
    Air Force Museum of New Zealand
    WW2
    World War Two
    Tugby
    Baffin
    S1654
    NZ156
    air to air
  • ALB845871b036
    Air Force Museum of New Zealand
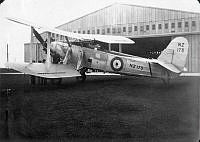
    Image from the Desmond Lloyd Percy Tugby personal album collection. 3/4 rear view of Baffin NZ173 in front of a hangar. Unknown location.
    RNZAF
    Air Force Museum of New Zealand
    WW2
    World War Two
    Tugby
    Baffin
    NZ173
  • WgF483
    RNZAF
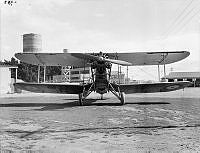
    Front view of a Baffin (NZ161?) at RNZAF Station Wigram.
    Wigram
    WW2
    World War Two
    RNZAF
    Baffin
    NZ161
  • WgF482
    RNZAF
    Side view of Baffin NZ161 at RNZAF Station Wigram.
    RNZAF
    World War Two
    WW2
    Wigram
    Baffin
    NZ161
  • WhTin96frame61
    RNZAF
    Baffin NZ171 on the airfield being refueled at RNZAF Station Hobsonville.
    RNZAF
    Baffin
    World War Two
    WW2
    Hobsonville
    NZ171
    fuel
    fire
    Mechanical Transport
    MT
  • DM330-52
    RNZAF
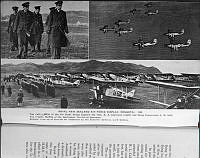
    Copy of a photograph in the book 'Wingspread' by Leo White, published by Unity Press, 1941. Between pages 180-181. RNZAF at the Rongotai Air Pageant, in 1938. Top left see ALB862456022. Bottom see OhG1602-79.
    RNZAF
    White
    Rongotai
    Grebe
    Avro 626
    Cochrane
    Baffin
    formation
    open day
  • 1989-275.46
    Air Force Museum of New Zealand
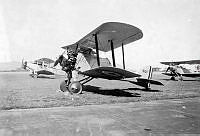
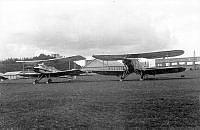
    Image from the Anita MacGibbon personal collection. Grebe NZ501 parked on the grass at RNZAF Station Wigram. Baffin S1566 (later NZ157) and a Tomtit in the background.
    Air Force Museum of New Zealand
    Grebe
    RNZAF
    Wigram
    MacGibbon
    Baffin
    S1566
    NZ157
    Tomtit
    NZ501
  • 2007-173.4
    Air Force Museum of New Zealand
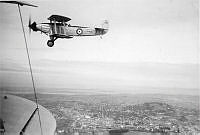
    Image from the Bertram Marchant Hodge personal collection. Air to air view of Baffin NZ164 in flight over Auckland. Handwritten on the reverse "Baffin aircraft over Auckland."
    air to air
    NZ164
    Baffin
    WW2
    World War Two
    Hodge
    Air Force Museum of New Zealand
    RNZAF
  • 2007-173.3a
    Air Force Museum of New Zealand
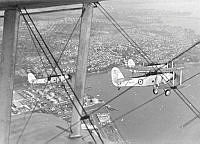
    Image from the Bertram Marchant Hodge personal collection. Air to air view of a formation of Baffins in flight over Auckland. Near aircraft is NZ176. Hand written on the reverse "Formation flying over Auckland. 1939."
    NZ176
    Baffin
    air to air
    formation
    Auckland
    WW2
    World War Two
    Hodge
    Air Force Museum of New Zealand
    RNZAF
  • 2003-128.3q
    Air Force Museum of New Zealand
    Image from the MH Lane personal collection. Vincent K4659, later NZ301, and a Baffin on the airfield at RNZAF Station Hobsonville.
    Air Force Museum of New Zealand
    Lane
    World War Two
    WW2
    Hobsonville
    Baffin
    Vincent
    NZ301
    K4659
  • 2003-220.1g
    Air Force Museum of New Zealand
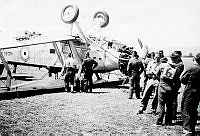
    Image from the Arthur Henry Harrison personal collection. Personnel standing around near Baffin NZ156 from No. 2 Squadron, after it was involved in a landing accident at RNZAF Station Omaka.
    Air Force Museum of New Zealand
    Harrison
    RNZAF
    WW2
    World War Two
    accident
    Baffin
    NZ156
    No. 2 Squadron
    2 Sqn
    Omaka
  • MUS1001735
    Air Force Museum of New Zealand
    3/4 front view of Baffin NZ155 'A' at RNZAF Station Woodbourne. Handwritten on the reverse "Stood on it's nose when starboard wheel collapsed. Dec 31, 1939" and "First Air Force "Kite" I went up in (F/O Keller)"
    RNZAF
    Air Force Museum of New Zealand
    World War Two
    WW2
    Woodbourne
    Baffin
    NZ155
  • MUS0901213
    Air Force Museum of New Zealand
    Baffin S1430 (later NZ152) from No. 2 Squadron, Territorial Air Force, after a taxiing accident at Omaka Aerodrome during annual camp. Nearest camera L-R: Doug Wood (back turned), Ken Smith, Fred Oleary, Roy Morphy (hand over eyes), Jack Reade, Miles Watson. Geoffrey Ellis (in background holding rope).
    NZ152
    S1430
    accident
    2 Sqn
    No. 2 Squadron
    Baffin
    Omaka
    RNZAF
    TAF
  • MUS0901218
    Air Force Museum of New Zealand
    Informal group of No. 1 Flight Riggers course with two Baffins at RNZAF Station Rongotai.
    Air Force Museum of NEw Zealand
    RNZAF
    World War Two
    WW2
    Rongotai
    training
    Baffin
  • 1981-019.4d
    Air Force Museum of New Zealand
    Image from the Albert H Wood personal collection. Rear view of a Tomtit in a workshop with a partly dismantled Baffin at left. Handwritten on the reverse "Taken at Addington"
    Baffin
    RNZAF
    Tomtit
    Wood
    Addington
    Christchurch
  • MUS940683a
    Air Force Museum of New Zealand
    RNZAF
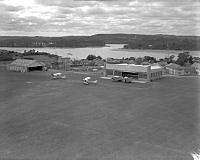
    Aerial oblique view of Baffins at RNZAF Station Hobsonville. Original RNZAF negative number HbF464.
    RNZAF
    Air Force Museum of New Zealand
    Hobsonville
    oblique
    hangar
    Baffin
  • MUS0102310
    Air Force Museum of New Zealand
    RNZAF personnel on and around a Baffin. Believed to be RNZAF Station Wigram.
    Air Force Museum of New Zealand
    RNZAF
    Baffin
    Wigram
  • MUS120065
    Air Force Museum of New Zealand
    Air to air view of Baffin S1425 in flight over Christchurch. Flying from RNZAF Station Wigram.
    RNZAF
    Air Force Museum of New Zealand
    Christchurch
    Baffin
    air to air
    S1425
  • MUS120139
    Air Force Museum of New Zealand
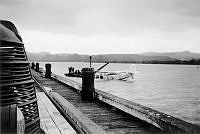
    No. 1 Squadron Baffin, NZ150, being salvaged from water after it ran out of fuel and landed in shallow water near RNZAF Station Onerahi. The crew, Flying Officer GKD MacKenzie, Aircraftman 2 AA Hodder and Aircraftman 1 BJT Heath, survived unhurt. The aircraft was used as an instructional air frame, INST29, at RNZAF Station Rongotai.
    Air Force Museum of New Zealand
    Baffin
    NZ150
    RNZAF
    accident
    World War Two
    WW2
    No. 1 Squadron
    1 Sqn
    Onerahi
  • ALB20171453005
    Air Force Museum of New Zealand
    Image from the Ronald William Gair personal collection. 3/4 front view of Baffin S1554 with engine running at RNZAF Station Wigram. Handwritten on the album page "R.N.Z.A.F. Aircraft. 1938."

    RNZAF
    Air Force Museum of New Zealand
    Gair
    Wigram
    Baffin
    S1554