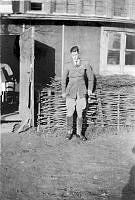
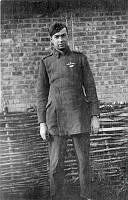
Image from the Keith Logan Caldwell personal album collection.
KL Caldwell outside a building at RAF Station Halluin, Belgium.
Original caption reads "K. L. C. Halluin".
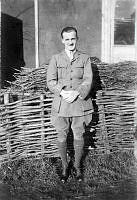
Image from the Keith Logan Caldwell personal album collection.
Informal portrait of an Officer. RAF Station Halluin, Belgium.
Original caption reads "Coverdale, Halluin".
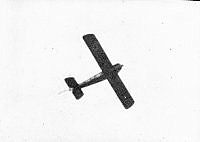
Image from the Ronald Burns Bannerman personal album collection.
Ground to air view of a Sopwith Dolphin in flight. Belgium.
Handwritten on the reverse "Dolphin. Belgium."
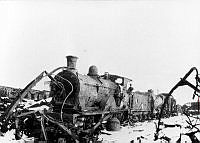
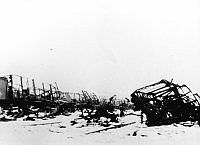
Image from the Ronald Burns Bannerman personal album collection.
Damaged railway locomotive in the railway yards at Luttre, Belgium.
Handwritten on the reverse "Luttre".
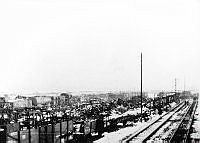
Image from the Ronald Burns Bannerman personal album collection.
Damaged railway rolling stock in the railway yards at Luttre, Belgium.
Handwritten on the reverse "Luttre".
Image from the Ronald Burns Bannerman personal album collection.
Damaged railway rolling stock in the railway yards at Luttre, Belgium.
Handwritten on the reverse "Luttre".
Image from the Ronald Burns Bannerman personal album collection.
Damaged railway rolling stock in the railway yards at Luttre, Belgium.
Handwritten on the reverse "Luttre".
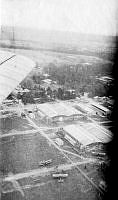
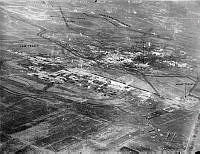
Image from the Ronald Burns Bannerman personal album collection.
Aerial oblique view of hangars on the edge of an airfield. Believed to be RAF Station Clermont.
Image from the Ronald Burns Bannerman personal album collection.
Informal portrait of RB Bannerman in uniform. Menen, Belgium.
Handwritten on the reverse "Self. Menin."
Image from the Ronald Burns Bannerman personal album collection.
Four children with two dogs attached to a small wagon. Mons, Belgium.
Handwritten on the reverse "Means of conveyance. mons."
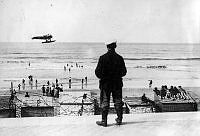
Image from the Keith Logan Caldwell personal album collection.
Man standing on shore watching a German Hansa-Brandenburg floatplane flying past. Ostend, Belgium.
Handwritten under the print on the album page "German seaplane (Brandenburg) at Ostend".
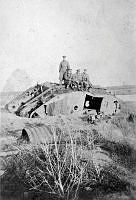
Image from the Keith Logan Caldwell personal album collection.
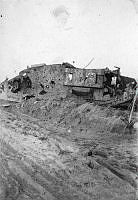
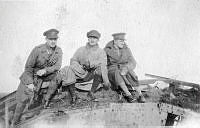
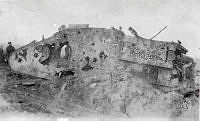
Four men sitting on a destroyed British tank at Ypres, Belgium.
Handwritten above the print on the album page "Tanks on Menin Road, Ypres".
Image from the Keith Logan Caldwell personal album collection.
Destroyed British tank at Ypres, Belgium.
Handwritten above the print on the album page "Tanks on Menin Road, Ypres".
Image from the Keith Logan Caldwell personal album collection.
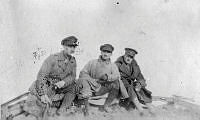
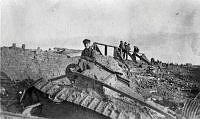
Group of officers sitting on a wrecked tank. Believed to be on the Menin Road, Ypres, Belgium.
See ALB920382A064 with a captioned similar image.
Image from the Keith Logan Caldwell personal album collection.
Group of officers sitting on a wrecked tank. Believed to be on the Menin Road, Ypres, Belgium.
See ALB920382A064 with a captioned similar image.
Image from the K. L. Caldwell personal album collection.
Three military personnel pose for the camera on a wrecked tank(?). Believed to be on the Menin Road, Ypres, Belgium.
See ALB920382A064 with a captioned similar image.
Image from the Keith Logan Caldwell personal album collection.
Wrecked British tanks at Ypres, Belgium.
Handwritten on the album page "Crashed tanks - Menin Road E Ypres 1919".
Image from the Keith Logan Caldwell personal album collection.
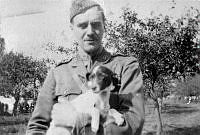
RFC Observer holding a small dog. Believed to be at Le Belle Vue, Belgium.
Handwritten beside the print in album "Harrison "8" Sqdn 1916" and "La Bellevue" in Dymo tape.
Image from the Keith Logan Caldwell personal album collection.
Unknown man sitting on a Wrecked tank. Believed to be on the Menin Road, Ypres, Belgium.
See ALB920382A064 with a captioned similar image.
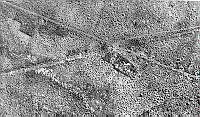
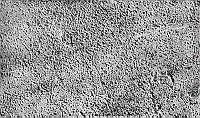
Image from the Alan Tozer personal collection.
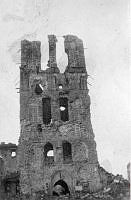
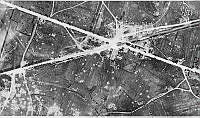
Vertical aerial view of Black Watch Corner, near Ypres, Belgium, after an artillery bombardment.
Handwritten on the reverse of the frame "Presented to Canterbury Aero Club by A.V. Barrow | 3rd Squadron A.F.C (1917). 1/5/54."
See 2004-044.1a_p2 for the 'before' view.