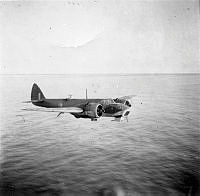
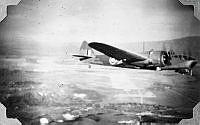
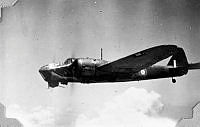
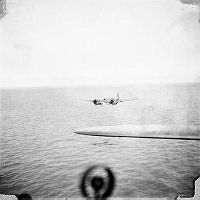
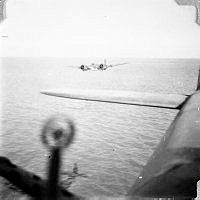
Image from the Ewan Brooking personal collection.
Air to air view of a No. 113 Squadron Blenheim in flight. Unknown location.
Handwritten on the reverse "Pa-an." which suggests this is on the way to Burma. See ALB1919010077
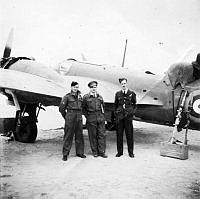
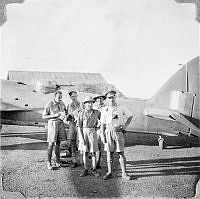
Image from the Ewan Brooking personal collection.
No. 113 Squadron crew standing beside Blenheim Z7791. Unknown location.
L-R: Sergeant John Wohlers RAAF, Lieutenant Viney SAAF, Sergeant E Brooking RNZAF.
Handwritten on a duplicate print "S.A.A.F. pilot, Aust. W/AG & myself on the way through from Egypt to Burma. Jan 1942."
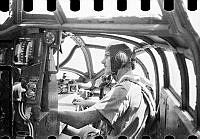
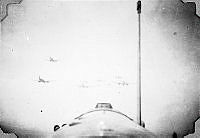
Negative from the Ewan Brooking personal collection.
No. 113 Squadron Navigator, Sergeant Ewan Brooking, at his position in a Blenheim.
See ALB191909164
Image from the Ewan Brooking personal album collection.
Air to air view of a No. 113 Squadron Blenheim in flight over RAF Station Loiwing, India.
Handwritten on the album page "Loi Wing 'drome."
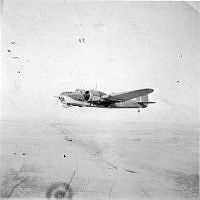
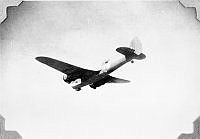
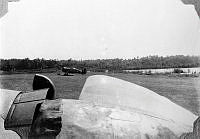
Image from the Ewan Brooking personal album collection.
Air to air view of a No. 113 Squadron Blenheim in flight. India.
Handwritten on the album page "No. 2."
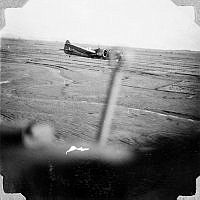
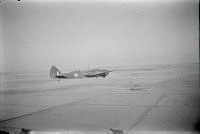
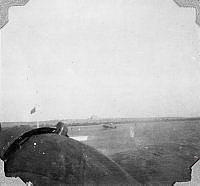
Image from the Ewan Brooking personal album collection.
Ground to air view of a No. 113 Squadron Blenheim. Believed to be at RAF Station Asansol, India.
Handwritten on the album page "Calcutta to Asansol." and "One of ours."
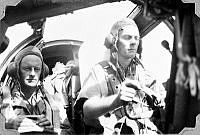
Image from the Ewan Brooking personal album collection.
No. 113 Squadron crew in the cockpit of a Blenheim leaving RAF Station Magwe, Burma.
Handwritten on the album page "Magwe to Asansol to Calcutta." and "Flying out: Alan & Chappie."
Chappie beilieved to be Sergeant Chapman, RCAF.
Image from the Ewan Brooking personal album collection.
Air to air view of a No. 113 Squadron Blenheim. Burma.
Handwritten on the album page "Zayatkwin to Magwe." and "Dead "on". "
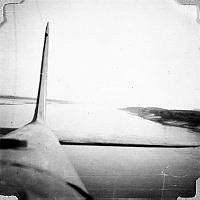
Image from the Ewan Brooking personal album collection.
Aerial oblique view of the Irrawaddy River, from a No. 113 Squadron Blenheim. Burma.
Handwritten on the album page "Zayatkwin to Magwe." and "The Irrawaddy."
Negative from the Ewan Brooking personal collection.
Air to air view of a No. 113 Squadron Blenheim flying to an operation at Mokpalin, Burma.
Handwritten on the album page "Zayatkwin." and "Off to Mokpalin."
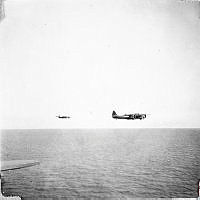
Image from the Ewan Brooking personal album collection.
Air to air view of a formation of No. 113 Squadron Blenheims.
Handwritten on the album page "Wreckage of crashed Japs." and "Off to Cheing-Mai."
Image from the Ewan Brooking personal album collection.
Air to air view of a No. 113 Squadron Blenheim in flight on an operation in Burma.
Handwritten on the album page " "OPs" and "Kado."
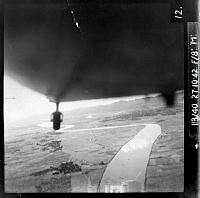
Image from the Ewan Brooking personal album collection.
Air to air view of a No. 113 Squadron Blenheim in flight on an operation in Burma.
Handwritten on the album page " "OPs" and "Moulmein."
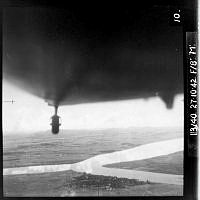
Image from the Ewan Brooking personal album collection.
Air to air view of a No. 113 Squadron Blenheim in flight on an operation in Burma.
Handwritten on the album page " "OPs" and "Kado."
Image from the Ewan Brooking personal album collection.
Air to air view of a No. 113 Squadron Blenheim in flight on an operation in Burma.
Handwritten on the album page " "OPs" and "Kawkareit."
Image from the Ewan Brooking personal album collection.
No. 113 Squadron crew standing beside the rear of one of their Blenheims, after an operation. RAF Station Mingaladon, Burma.
Handwritten on the album page " "OPs" and "Safe return."
Negative from the Ewan Brooking personal collection.
Air to air view of a No. 113 Squadron Blenheim in flight over RAF Station Toungoo (Taungoo), Burma.
Handwritten on the album page "Akyab to Toungoo / Toungoo to Lashio." and "Toungoo Aerodrone."
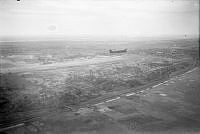
Image from the Ewan Brooking personal album collection.
Airfield at RAF Station Jodphur, India, from a No. 113 Squadron Blenheim.
Handwritten on the album page "Karachi to Jodhpur to Allahabad to Calcutta." and "Jodphur Airport."
Image from the Ewan Brooking personal album collection.
View of an RAF Mohawk(?), viewed from a No. 113 Squadron Blenheim, at RAF Station Dum Dum, Calcutta, India
Handwritten on the album page "Karachi to Jodhpur to Allahabad to Calcutta." and "Dum-Dum airport."
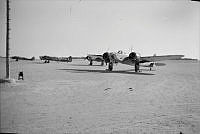
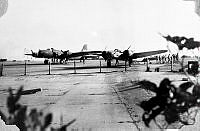
Image from the Ewan Brooking personal album collection.
9th Squadron, USAAF B17 41-2464 and a No. 113 Squadron Blenheim on the airfield at RAF Station Karachi, India (now Pakistan).
Handwritten on the album page "Bahrein [sic] Is. to Sharjah to Karachi." and "Karachi civil airport." and " "Fortress" and Blenheim."