Image from the David Andrew Dunn personal collection.
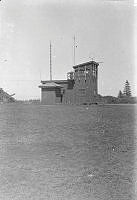
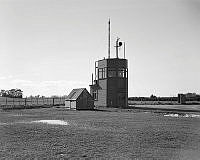
Control Tower at Norfolk Island.
Associated document describes: "Control tower viewed from the same location as photograph No. 6 [1986-016.73], but at a later date, after relocation of the meteorological section and removal of the met. mast. An antenna mast has been added beside the stairs to the control tower to support one end of an antenna for an emergency D/F transmitter located on the ground floor of the building."
Image from the David Andrew Dunn personal collection.
Control Tower at Norfolk Island.
Associated document describes: "View of the SW side of the control tower located at the intersection of the airstrips. The medium frequency direction finding loop, sense antenna for the D/F set, signal mast to warn of arriving or departing aircraft by raising the "sausage", and meteorological mast over the small square meteorological instrument room are all illustrated in this photograph."
Image from the David Andrew Dunn personal collection.
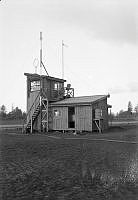
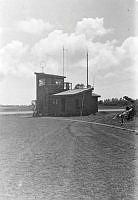
Control Tower at Norfolk Island.
Associated document describes: "Control tower viewed from approximately south at about the same time as photograph No. 5 [1986-016.3.5] The ground floor of the tower was probably used by the meteorological section prior to their relocation further along the steel strip. Note the path leading off to the right of the picture to the D/F residence comprising sections of airstrip steel matting."
Image from the David Andrew Dunn personal collection.
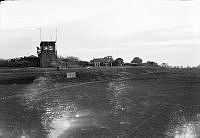
Control Tower at Norfolk Island.
Associated document describes: "Control tower and D/F residence photographed almost from the centre of the runway intersection. The house accommodated all of the original five members of the D/F section who fended for themselves independently of the main camp. Cooking and household chores were shared between the five. Stores drawn from the stores section and main camp messes were at times augmented by the gathering of wild fruit and vegetables, and frequently by gifts from generous Norfolk Islanders. The islanders also extended hospitality by frequent invitations to meals. This "later" photograph was taken after the relocation of the meteorological section and its instruments. It also shows the enclosed signal panels in front of the tower."
Image from the David Andrew Dunn personal collection.
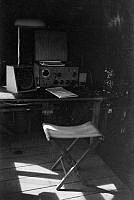
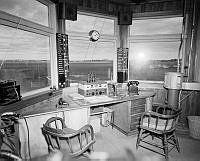
Direction Finding equipment at Norfolk Island.
Associated document describes: "This medium frequency radio direction finding unit (not radar) was installed in the control tower to provide a continuous 24 hours per day service. (Note. The control tower windows have been covered for taking of the photograph). The )-360 degrees bearing scale can be seen on the left of the operator's desk, the handwheel for rotating the loop below the desk and )-360 degrees scale, and immediately above, the shaft extending up through the tower's roof to the loop."
NB. The above is the first part of an extended description of the operation of the D/F equipment.
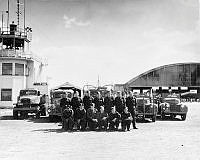
Group. Fire Section personnel in front of fire vehicles and the Control Tower at RNZAF Station Whenuapai.
Original RNZAF negative missing, this file made from copy-negative.
Negative from the Ewan Brooking personal collection.
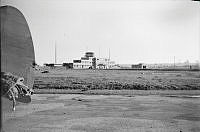
View of the Control Tower building from beside a No. 113 Squadron Blenheim, at RAF Station Lydda, Palestine (now Lod, Israel).
Handwritten on the album page "Heluan to Lydda / Lydda to Habbaniya." and "Lydda Control Tower."
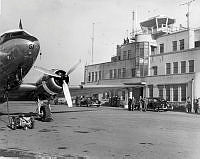
No. 42 Squadron Dakota NZ3551, parked outside the control tower building, after bringing the Governor General to RNZAF Station Wigram.
Original RNZAF negative deteriorated, this file taken from a contact print.
Image from the Robert Gordon Harvey personal collection.
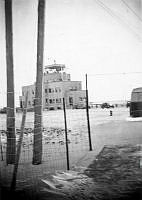
Control Tower at RCAF Station Regina, Canada.
Handwritten on the reverse "Regina Airport control tower. Dec 1942."
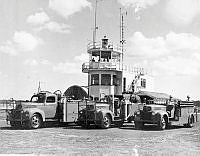
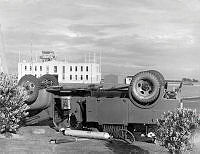
Fire tender MT3608, which over-turned while rushing back to collect more foam for No. 75 Squadron Mosquito NZ2337 on fire in a hangar at RNZAF Station Ohakea.
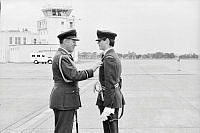
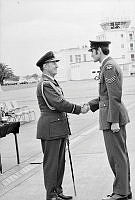
Air Commodore MS Gunton OBE AFC presenting the Pilot's Badge to a member of No. 7/77 Pilots course during the Air Officer Commanding's final Parade and graduation of No. 7/77 Pilots course at RNZAF Base Ohakea.
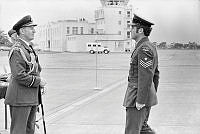
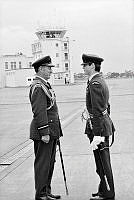
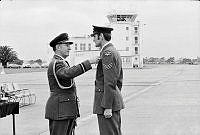
Air Commodore MS Gunton OBE AFC presenting the Long Service and Good Conduct Medal during the Air Officer Commanding's final Parade and graduation of No. 7/77 Pilots course at RNZAF Base Ohakea.
Air Commodore MS Gunton OBE AFC presenting the Pilot's Badge to a member of No. 7/77 Pilots course during the Air Officer Commanding's final Parade and graduation of No. 7/77 Pilots course at RNZAF Base Ohakea.
Air Commodore MS Gunton OBE AFC presenting the Long Service and Good Conduct Medal during the Air Officer Commanding's final Parade and graduation of No. 7/77 Pilots course at RNZAF Base Ohakea.
Air Commodore MS Gunton OBE AFC presenting the Long Service and Good Conduct Medal during the Air Officer Commanding's final Parade and graduation of No. 7/77 Pilots course at RNZAF Base Ohakea.