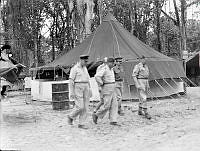
Chief of Air Staff, Air Vice Marshal LM Isitt and entourage during a visit to a forward area camp. Believed to be Bougainville.
Original RNZAF negative out of focus.
The Chief of Air Staff, Air Vice-Marshal LM Isitt and entourage during a visit to a forward area camp. Believed to be Bougainville.
Isitt is standing at centre and Wing Commander CWK Nicholls is second from the right.
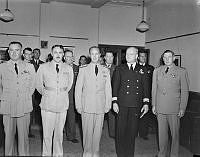
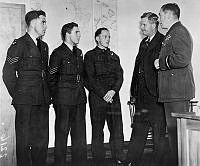
Group of senior officers at the presentation of the Legion of Merit (US) (Degree of Officer) to Air Commodore S Wallingford. RNZAF Station Whenuapai.
L-R: Air Commodore MW Buckley, Air Commodore S Wallingford, Rear Admiral RB Carney USN, Commodore SD Jupp USN (also having received the Legion of Merit), Chief of Air Staff, Air Vice Marshal LM Isitt.
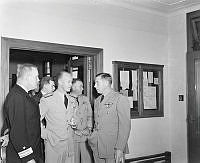
Presentation of the Legion of Merit (US) (Degree of Officer) to Air Commodore S Wallingford. RNZAF Station Whenuapai.
L-R: Commodore SD Jupp USN, unknown, Rear Admiral RB Carney USN, Air Commodore MW Buckley, Air Vice Marshal LM Isitt, Chief of Air Staff.
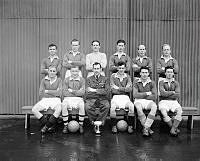
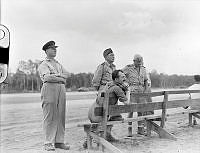
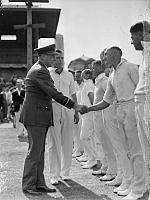
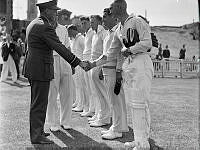
The Chief of Air Staff, Air Vice Marshal LM Isitt, meeting with members of the RNZAF First Eleven cricket team at the Basin Reserve, Wellington.
AVM Isitt is shaking hands with R McVicar.
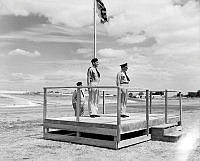
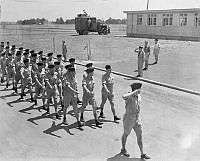
The Chief of Air Staff, Air Vice Marshal LM Isitt, reviewing a parade by No. 14 Squadron at RNZAF Station Ardmore.
Standing behind Isitt is the Squadron Commanding Officer, Wing Commander JJ de Willimoff.
The Chief of Air Staff, Air Vice Marshal LM Isitt, reviewing a parade by No. 14 Squadron at RNZAF Station Ardmore.
Standing behind Isitt is the Squadron Commanding Officer, Wing Commander JJ de Willimoff.
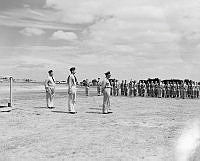
No. 14 Squadron personnel marching past the Chief of Air Staff, Air Vice Marshal LM Isitt. RNZAF Station Ardmore.
Leading the parade is the Squadron Commanding Officer, Wing Commander JJ de Willimoff.
Group of three repatriated prisoners of war talking with Mr. TA Barrow (Air Secretary) and teh Chief of Air Staff, Air Vice Marshal LM Isitt OBE. Unknown location.
Group of three repatriated prisoners of war talking with Mr. TA Barrow (Air Secretary) and teh Chief of Air Staff, Air Vice Marshal LM Isitt OBE. Unknown location.
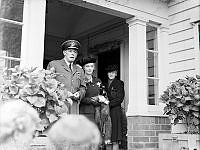
Group of guests at an Air Force Relations garden party. Unknown location.
Mrs Deere (third from the right). Chief of Air Staff, Air Vice Marshal LM Isitt OBE (right).
Arrival of Air Chief Marshal Sir KR Park GCB KBE MC DFC at RNZAF Station Ohakea.
L-R: Chief of Air Staff, Air Vice Marshal AdeT Nevill, Retired Chief of Air Staff, Air Vice Marshal LM Isitt, unknown (NZ Politician?), ACM Sir KR Park, Lady Park.
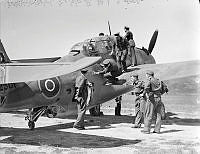
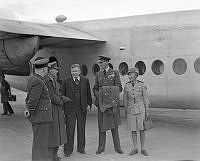
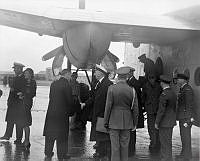
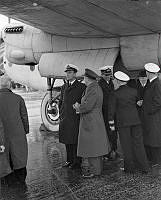
Arrival at RNZAF Station Ohakea of Lord Louis Mountbatten GCVO KCB DSO Supreme Allied Commander of South East Asia and Lady Mountbatten DCVO CBE, by RAF York MW102.
Arrival at RNZAF Station Ohakea of Lord Louis Mountbatten GCVO KCB DSO Supreme Allied Commander of South East Asia and Lady Mountbatten DCVO CBE, by RAF York MW102.
Lord Mountbatten (2nd from left) speaking with the Chief of Air Staff, Air Vice Marshal LM Isitt (3rd from left).