Image from the Pat Ford personal collection.
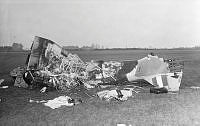
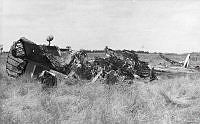
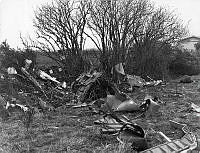
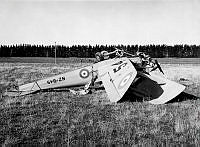
Wreckage of Tiger Moth NZ1483 from No. 2 Elementary Flying Training School, after crashing in a field "10 miles south of Wigram."
The pilot, Leading Aircraftman WO Sly was injured.
Handwritten on the reverse "2EFTS Ashburton / crashed 6/Sept/1944 [sic] / unauthorised low flying."
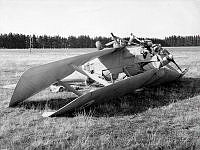
Image from the Pat Ford personal collection.
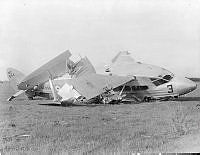
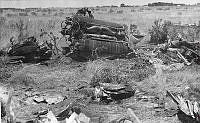
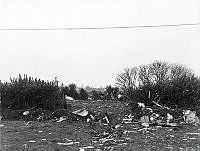
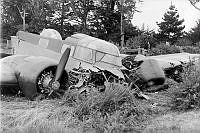
Wreckage of Tiger Moth NZ845 from No. 2 Elementary Flying Training School after crashing in a field near Mayfield.
The pilot, Leading Aircraftman TD Faithful was slightly injured.
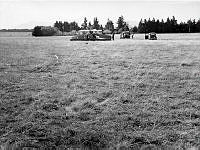
Image from the Pat Ford personal collection.
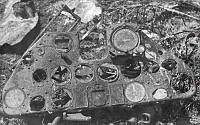
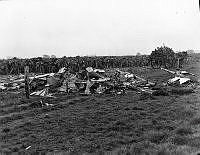
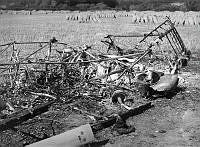
Wreckage of Tiger Moth NZ845 from No. 2 Elementary Flying Training School after crashing in a field near Mayfield.
The pilot, Leading Aircraftman TD Faithful was slightly injured.
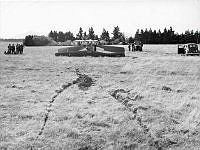
Image from the Pat Ford personal collection.
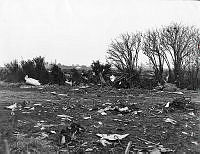
Wreckage of Tiger Moth NZ845 from No. 2 Elementary Flying Training School after crashing in a field near Mayfield.
The pilot, Leading Aircraftman TD Faithful was slightly injured.
Image from the Pat Ford personal collection.
Wreckage of Tiger Moth NZ845 from No. 2 Elementary Flying Training School after crashing in a field near Mayfield.
The pilot, Leading Aircraftman TD Faithful was slightly injured.
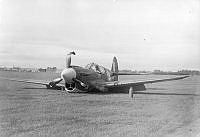
Image from the Pat Ford personal collection.
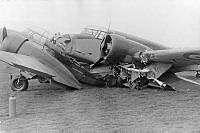
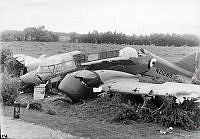
Wreckage of Oxford NZ1283 from No. 3 Service Flying Training School after crashing near RNZAF Station Ohakea.
See also 1988-176.5
Image from the Pat Ford personal collection.
Wreckage of Oxford NZ1283 from No. 3 Service Flying Training School after crashing near RNZAF Station Ohakea.
See also 1988-176.26b
Image from the Pat Ford personal collection.
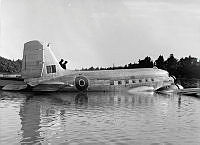
No. 41 Squadron Dakota NZ3549 after landing in the Waitemata Harbour near RNZAF Station Whenuapai during a training flight.
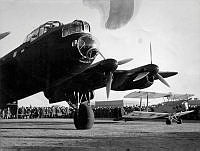
Image from the Pat Ford personal collection.
RAAF Lancaster ED930 (A66-1) "Queenie VI" with a Tiger Moth under the port wing at RNZAF Station Wigram.
Original negative WgG1324-43
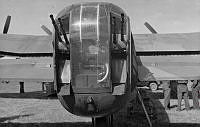
Image from the Pat Ford personal collection.
Rear gun turret of RAF Lancaster PD328 'Aries' from the Empire Central Navigation School at RNZAF Station Wigram.