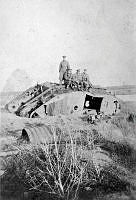
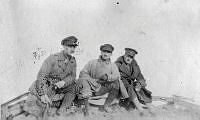
Image from the Keith Logan Caldwell personal album collection.
Four men sitting on a destroyed British tank at Ypres, Belgium.
Handwritten above the print on the album page "Tanks on Menin Road, Ypres".
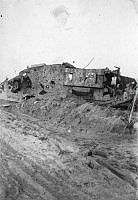
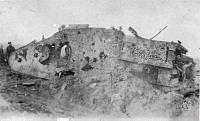
Image from the Keith Logan Caldwell personal album collection.
Destroyed British tank at Ypres, Belgium.
Handwritten above the print on the album page "Tanks on Menin Road, Ypres".
Image from the Keith Logan Caldwell personal album collection.
Group of officers sitting on a wrecked tank. Believed to be on the Menin Road, Ypres, Belgium.
See ALB920382A064 with a captioned similar image.
Image from the Keith Logan Caldwell personal album collection.
Group of officers sitting on a wrecked tank. Believed to be on the Menin Road, Ypres, Belgium.
See ALB920382A064 with a captioned similar image.
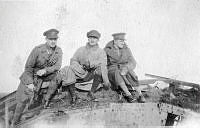
Image from the K. L. Caldwell personal album collection.
Three military personnel pose for the camera on a wrecked tank(?). Believed to be on the Menin Road, Ypres, Belgium.
See ALB920382A064 with a captioned similar image.
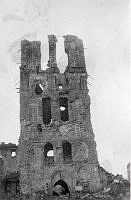
Image from the Keith Logan Caldwell personal album collection.
Wrecked British tanks at Ypres, Belgium.
Handwritten on the album page "Crashed tanks - Menin Road E Ypres 1919".
Image from the Keith Logan Caldwell personal album collection.
Unknown man sitting on a Wrecked tank. Believed to be on the Menin Road, Ypres, Belgium.
See ALB920382A064 with a captioned similar image.
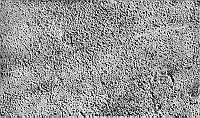
Image from the Alan Tozer personal collection.
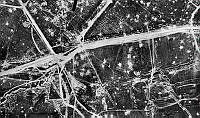
Vertical aerial view of Black Watch Corner, near Ypres, Belgium, after an artillery bombardment.
Handwritten on the reverse of the frame "Presented to Canterbury Aero Club by A.V. Barrow | 3rd Squadron A.F.C (1917). 1/5/54."
See 2004-044.1a_p2 for the 'before' view.
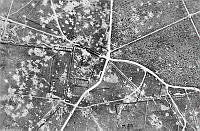
Image from the Alan Tozer personal collection.
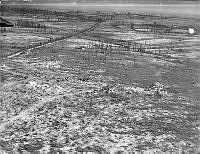
Vertical aerial view of Polygon Wood, near Ypres, Belgium, before an artillery barrage.
Handwritten on the reverse of the frame "Presented to Canterbury Aero Club by A.V. Barrow | 3rd Squadron A.F.C (1917). 1/5/54."
See 2004-044.1b_p3 for the 'after' photo.
Image from the Alan Tozer personal collection.
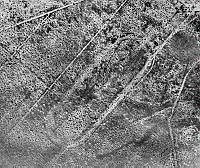
Vertical aerial view of Black Watch Corner, near Ypres, Belgium, before an artillery bombardment.
Handwritten on the reverse of the frame "Presented to Canterbury Aero Club by A.V. Barrow | 3rd Squadron A.F.C (1917). 1/5/54."
See 2004-044.1a_p3 for the 'after' view.
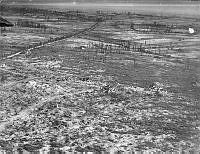
Image from the Alan Tozer personal collection.
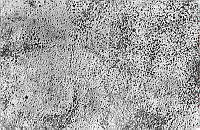
Vertical aerial view of Polygon Wood, near Ypres, Belgium, after an artillery barrage.
Handwritten on the reverse of the frame "Presented to Canterbury Aero Club by A.V. Barrow | 3rd Squadron A.F.C (1917). 1/5/54."
See 2004-044.1b_p2 for the 'before' view.
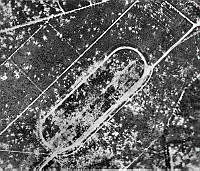
Vertical aerial view of a road intersection at Polygoneveld (Polygonwood), near Ypres, Belgium.
See MUS140102 for a view of this same area about two months earlier.
Vertical aerial view of a road intersection at Polygoneveld (Polygonwood), near Ypres, Belgium.
See MUS140103 for a view of this same area about two months later.